CLICK HERE FOR FREE BLOG LAYOUTS, LINK BUTTONS AND MORE! »
Showing posts with label DIY. Show all posts

Saturday, May 5, 2012

Sew Its Saturday: DIY Graduation GIfts


It’s May. The time for all things graduation…Proms, final exams, last lunches with high school friends and of course, Graduation!!!

But, what do you get the Graduate, especially, when most of them already have and iPod, iPhone, Wii, Playstaton or any number of other game systems. Well, have no fear…Annette is here! Okay, that was super cheesy, right?! I promise, I won’t let it happen again! Ha!

But, seriously…what do you get them? Well, if you’ve been reading my posts lately, you might realize that I love anything DIY – especially if I can use my digital scrapbooking program from Creative Memories, Storybook Creator Plus 4.0. Check it out here.

Today, I’m going to share with you a few Graduation gifts that you can make yourself on the cheap! Most of these gifts would be great for a High School or College Graduate.


1. Make a picture collage of sorts. I made the above collage/picture for my cousin’s high school graduation several years ago. The background picture has an overlay of grass to give it some texture and stand-out from the other pictures layered on top. I printed it as an 8x10, put it in a nice black frame and Voila – quick, easy, nice graduation gift!

2. If you’d like to do a larger scale gift, you can always make a custom poster collage!! Again, I can use my Creative Memories program to create a custom poster. Or go to our digital center and just plug-in some photos and you’re done!! It’s just that simple – really!!!

3. Have too many pictures for a poster or collage? Make a digital album! Creative Memories offers a variety of styles and sizes. If you’re in a hurry, make the 7x5 softcover album for only $17.95!! If you have more time and want to include graduation and prom photos, choose one of the Personalized Hardcover or Leather Premium Storybooks. What makes this so great is you can download a FREE 30 day trial of the program and use it to make your album! Create, upload, order and have it shipped directly to you!!

4. Want to give your grad something inspirational, make a softcover album filled with Scriptures that will help them, encourage them and guide them in their new journey and life adventure.

5. With Creative Memories you can also create custom calendars! Create a calendar full of personal pictures for your new graduate! They can relive high school or collage memories and have all the important dates right at their fingertips!! I have one hanging on my refrigerator now and I love looking at the pictures each month! Granted, mine isn’t for graduation, but I like it just the same!

6. If your graduate was involved in sports or band, you might consider making a shadow box showcasing what they love. My youngest brother was a member of his high school band (a Nationally renowned band, no less) and it would have been great to make him a shadow box. Take a picture of him marching, their program t-shirt design displayed and a few other memorabilia would have been great!! You can do the same thing for a sport player or drama “nerd” (don’t worry…I was one of those too). Just be creative!!!

7. Several websites offer very custom gifts such as: blankets, pillows, mouse pads, mugs, t-shirts…you name it they have it!! If your grad likes coffee, make them a special mug. If they like to snuggle up on the couch and watch movies – make a blanket! I kinda like the pillowcase idea myself. Wouldn’t it be so fun to wake up with your “best friends” from high school every morning – even if you’re all at a different school?! What fun!

I hope you see where I’m going with these. I love pictures and I think it’s so important to preserve our memories with them. It really is so true that a picture is worth a thousand words! A smile, the lighting and sometimes even the screaming fits just make you remember those precious moments – whatever they are.

So, go out there and find some pictures to create a wonderful gift for that graduate in your life! Believe me…they will look at them and appreciate it!

Happy Graduation Month!!!

Blessings,
Annette


Linking up:
CraftEnvy – Spotlight Saturday
BeDifferent Act Normal

This is my last post on this site. Please come visit me over at In All You Do and subscribe to me there!!!! See ya soon!

Saturday, April 28, 2012

Sew Its Saturday: 10 DIY Mother's Day Gifts She's Sure to Love


Can you believe Mother’s Day is coming up in just 3 short weeks?? I can’t believe it’s almost May, let alone Mother’s Day!! And, if you’re like me, you have thought of a million and one different gifts to give your sweet momma. Yet you have nothing to give her!

Yep…I always have great intentions and lofty goals of these wonderfully elaborate gifts that don’t ever seem to come to fruition. So, this year I’m starting a little early…okay, earlier than I usually do anyway!

I am a big believer in homemade gifts for those we love; especially parents and grandparents. If you’re like me, you have enough knick-knacks around and you don’t want anything else to dust! And the time and care that goes into those homemade gifts is just priceless!!

Mom’s love their “job” but at the end of the day, let’s face it…it’s nice to be pampered. 

So, here are 10 DIY Mother’s Day gifts that do just that – show her how much you love and appreciate her!

1. Mini Scrapbook Album – I made these a few years back for the grandma’s and great-grandma’s in our family. They were a huge hit! Some of them even carried them around for months to show off their precious heirlooms!! Mine were paper album kits from Creative Memories, much like this one for Mom or this one for Grandma. Add a few fun photos of your sweet kiddos, some sentimental words (or funny ones if you like) and presto…you’re done!

2.  Handprint/Footprint canvas – I actually made these for Christmas for all the grandparents and greats. But, you could change it up a bit and do handprints as flowers for a bouquet for Mom or footprints as butterflies. Or come up with a design all your own! Let the kids help and who knows what you’ll come up with! Be creative and mom’s sure to love it!!

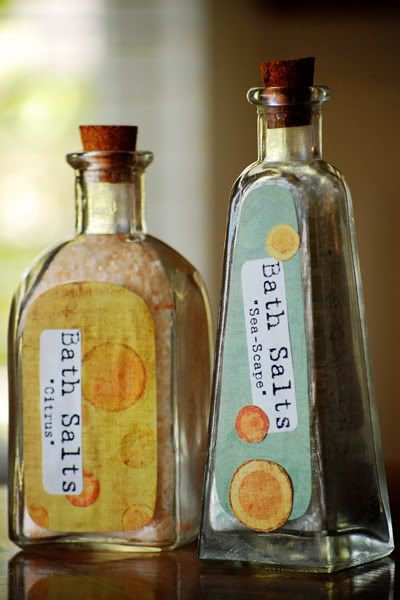
3.  Homemade Sugar Scrubs and Bath Salts – Purchase this ebook and make Mom some homemade sugar scrubs!! Purchase an extra copy and give the recipes to her so she can make her own! Or use this simple and quick recipe to make Mom some scented bath salts.

4. Homemade Lip Balm – Now, I’m not one to wear lipstick, but I love my chapstick. But, I would love to have some homemade lip balm!! This blog gives 3 recipes (Mandarin Nutmeg, Peppermint Cocoa & Lime Coconut) but at the end it gives some tips on creating your own recipes!

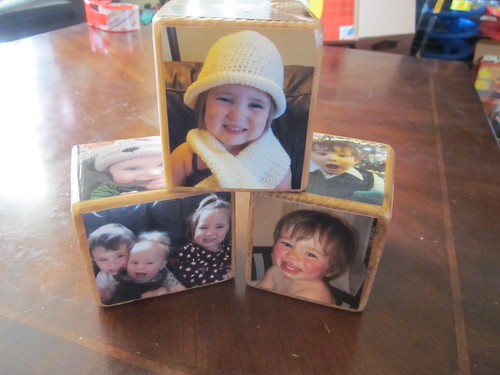
5. Photo Cubes – Another quick and easy gift for Mom or Grandma. This blog post gives great instructions on how to create your own Photo Cubes. Use scrapbook paper to back smaller photographs or just to dress it up a bit! Get creative and just go for it!

6. Photo Tile – I saw this tile sometime last year and knew I could make those for the grandparents and greats for Christmas. But, it would also work for Mother’s Day!! Take the kids out for a fun afternoon (or morning, when its cooler) of candid picture taking and make some tiles for Mother’s Day! Dress it up with some scrapbook paper and a few 3D embellishments and you’ll be set!

7.  Homemade Glass Pendants – I made some of these for the girls in my family this past Christmas. These two blogs (here and here) have some great ideas on different pendant ideas. They are super easy to make and most craft stores will have what you need!! Again, take the kids out for some candid pictures, pick our your favorite and you’re ready!

8. Sweet Hanging SachetsSew 4 Home has a great tutorial on how to make these uber cute hanging sachets!! Hang it on a decorative hanger and you’re good to go!!

9. DIY Painted Canvas Tote – Ashley is so talented and she’s done it again! She has a super easy to follow tutorial on how she created this divine tote. You could paint her favorite flowers in her favorite color or…put the kids’ handprints on it for a more personal touch that she’s sure to love! Slip in a couple books she likes or a “chick-flick” she’s had her eye on. Or better yet…get her a gift certificate for a pedicure, massage or another special “treat”!!!

 My inspiration for the Mom’s Day OFF Jar

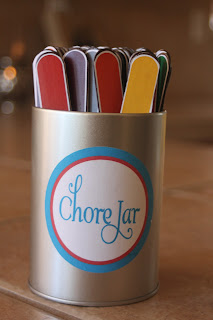
10. Mom’s Day OFF Jar –Give Mom a “day off” by pulling out a slip of paper and doing what it says. Have the kids help decorate the jar on the outside and then put paper flowers, colored by the kids, attach them to pipe cleaners and you’ve got a homemade kid-bouquet! You’ll have to forgive me for not having one of these to show you. (I’m secretly hoping the Hubster will give me one of these this year!) Feel free to download, print and use my Free Printable here. To use my printable, cut the Mom’s Day OFF button out and adhere to a jar/can with Mod Podge. Then, cut apart the strips of chores and fold them in half and stick them in the jar/can. I also left some blank strips so you can fill in your own ideas. Add your own homemade flowers and voila…Mom gets a “Day OFF” and a bouquet from her favorite little people!


Hope that gives you some quick and easy ideas for Mother’s Day. There are certainly many more ideas out there these were just some of my favorites!

What’s your favorite Mother’s Day gift?? How do you celebrate Mother’s Day?

Please share your thoughts and ideas in the comments or leave a link to your own post! I love reading them and its keeps my creative juices flowing!!

Blessings,

Friday, April 13, 2012

Homeschool Happenings: Weekly Review #2


This past Sunday I sat down and outlined the rest of our school year. Now, I basically knew what we were doing and when, but I wanted exact pages written down. Such as, how many pages in Science we read each day or in our Bible curriculum. I usually just guess and stop when it feels right, but I thought…ya know, we’ve only got a few weeks left of school, so I better make sure we’re finished with our current curriculum by then.

Simply…I needed a plan! Now I have one and I am beyond giddy about it. That makes me a nerd, right?! It’s okay…I’m over it!

A few months back, I realized that fighting with my son to do his papers every. single. day. was pointless. He was never going to love them as much as I do. In fact, he was never going to even like them! So, we made a deal…we would switch off doing papers and reading from the texts. That way, he’s not overwhelmed with an hour of reading followed by an hour of pleading with him to do his papers, half an hour crying (me and him) and eventually 20 minutes of paperwork. Now we have this schedule:

Monday, Wednesday & Friday: Reading texts (Science, History, Bible)
Tuesday, Thursday & Saturday: Paperwork (Geography, Math, Writing, Spelling)

Through the end of our year in May, we have school on Saturdays because of how much we missed with the passing of my Daddy. Plus, we take off most of December and many Thursdays we take time off to spend with The Hubster (aka Da-Da) on his day off work. When our year starts over in June (we school year-round), we won’t have school on Saturdays.

This week The Hubster was able to spend some quality time with our oldest on a science experiment/project we’ve wanted to do for a while. And boy, oh boy, did they have fun?!  And they still are!!!!

This year we’ve used Apologia’s Exploring Creation with Astronomy for Science and we’ve loved every minute of it! So, this experiment was in the book for an extra assignment related to Jupiter. I’m going to relay it to you all and give some helpful tips/hints we discovered along the way.

You will need:
2 plastic soda pop or water bottles (we read that 1L are best)
1” washer (we found this not to do well & leak quite a bit. See our solution below)
Water-resistant tape (we used duct tape)


Instructions:
  1. Fill one bottle 2/3 full of water. (We added a few drops of green & blue food coloring so we could really see the hurricane at work.)
  2. Place the washer on top of the mouth opening. If you use this method, make sure the washer has a large enough hole to allow the water to flow easily.
  3. Place the other bottle upside-down on top of the washer.
  4. Tape the two bottles together very thoroughly. If it leaks, they suggest adding more tape & wrapping it tighter. We found that ours still leaked, but it was considerably less when we added more tape.
  5. Turn the two-bottle setup over so that the bottle with water in it is now the upside-down bottle on top.
  6. Move the bottles in a circular motion, swirling the water around in the same direction for a moment.
  7. Watch your system form a hurricane-shaped funnel down into the bottle below. You can repeat this as often as you like.
NOTE: Some people like to add glitter or even small toys in the bottles so they can watch them swirl around.

Okay, so we followed these instructions to the “t” the first time. It leaked. We added more tape and wrapped it tighter. It still leaked, only less.
This is the original washer. See how small the vortex is?
Make sure your washer has a large enough opening.
Then, The Hubster…havng the “engineer mind” that he does, started searching the internet for tips/options. And he found this! And at a store right up the street from us – WOO HOO!!!! He was nearly giddy with excitement and practically counting down the minutes until he could go get one! Silly man!

Unfortunately, our store ended up not having that exact brand and the one he found ended up costing about 4x as much. However, as my Dad always said, “You get what you pay for.” And this particular brand had TWO experiments in it! One for the hurricane and one for a fountain.

Isn't that a GREAT vortex?!
So…now we have not one, but TWO Science experiments hidden in the pantry out of sight for the Littles. They have been a GREAT source of learning, entertainment and of course, FUN!!

What did you do this week in your homeschooling journey? Feel free to share you favorite experiment, tip, idea or just a word of encouragement for others!!


(I will put up a video soon. But, the one I had, had some loud background noise...imagine that?!)

Blessings,
Annette

I’m linking up to these other GREAT Homeschool Weekly Reviews!
Click on the links to check them out!

Monday, April 9, 2012

Sew its Saturday: DIY Easter Hats


I know this DIY project is not highly creative, but I was proud of my find and frugal-ness! So alas…I share it with you. Don’t laugh at me, but you can giggle a bit! I know I’m goofy and not that creative. I’m working on it though!

But, while you’re here you might as well enjoy some cute pictures too! So, sit back, relax and smile!

A couple months ago I found all of our kids’ Easter outfits. I was beyond thrilled! Then last week I realized my girls had no hair bows to match their dresses!!! AAHHHH!!!!!

As I was walking through Target last week, I glanced at the $1 bins (which I love by the way) and saw these cute hats! I picked up two of them and instantly knew I could make them work for the girls’ dresses. WAHOO!!!

So, Saturday morning…yes, the day before Resurrection Sunday…I set out to transform these hats. Pretty easy really, but so fun! Well, all except for my poor burnt fingertip…

First, I removed the pink ribbon from the hats.

Then, I measured the length of the pink ribbon, so I knew how long to make my purple ribbon.

Measure out the purple ribbon and cut. Be sure to use a cute little helper to hold the scissors in place while you take a picture too! Never mind his dirty finger I called him in from outside to help. Next time I’ll be sure to make him wash his hands before he models for me!

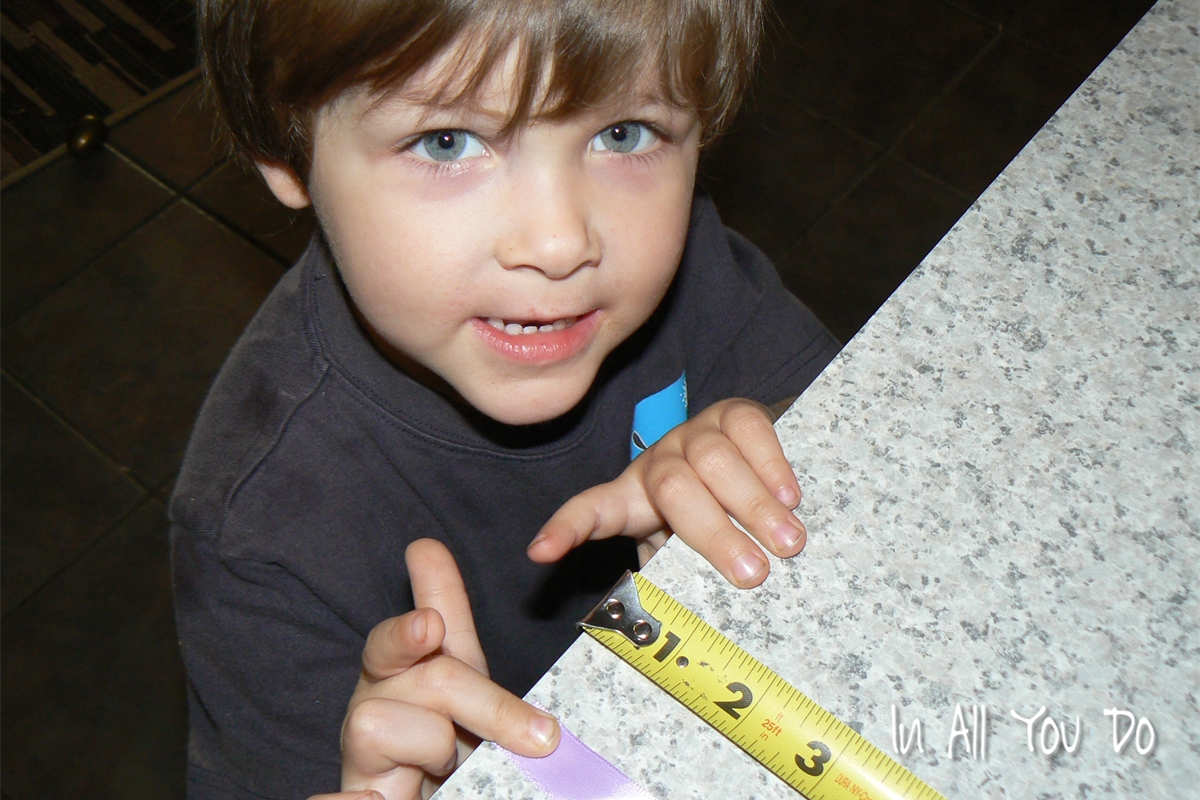
Since big brother was helping, Mr. Mouse decided he needed to help by holding the tape measure and ribbon for me! Those blue eyes melt my heart!!

Next I put the purple ribbon around the hat and made sure it was even before tying the knot.

Once it was even, I tied a knot in it. Actually, I tied a double knot, but I recommend only a single knot.

Now, most of you probably know this trick, but for those of you who don’t…in order to make a perfect and easy bow, simply make two loops, wrap one around the other and through, then pull tight. That way the loops stay nice and pretty!

Isn’t it pretty?!

Make sure you trim the edges at an angle before you’re done!

And since I was using two colors, I then measured the green ribbon right on the hat. I forgot to take a picture of that, so pretend this isn’t cut yet and I’m really measuring it. I just started as close to the knot as I could on one side and wrapped it around until I was as close to the knot on the other side.

Last I took my hot glue gun and tacked the ribbons in place so they wouldn’t fall off. If you’re a better crafter than I, you should probably put the glue on before you tie the first ribbon. Mine didn’t end up quite as straight as I’d like, but they work!

Don’t forget to remove the price tags! You wouldn’t want anyone mistaking your beautiful work for a professional. Haha

This entire project cost me the $2 for the hats and then $4.87 for the ribbon!! These cute little hats for less than $7.00!!!! Now that’s a DIY project I can fund!

So, here are some cute pictures from Resurrection Sunday and the girls’ in their oh so cute hats!

Here’s my sweet family!!! I’m so lucky! I edited the picture a bit, it's not completely perfect, but it works!

Here are the Littles. My oldest daughter is having a major meltdown, as you can see…all because her shoe (in the purple circle) came un-done! I’m pretty sure the hunger and desperate need of a nap had nothing to do with it! Ha!

And this precious little bundle is always full of smiles!! She brightens my day with this contagious smile!! She is a complete JOY to have in our family!

Blessings,
Annette

Saturday, March 24, 2012

Sew its Saturday: Grow With Me albums


A couple weeks ago, I posted about doing Monthly Digital Cards for my babies. Even though digital is now my preferred method of scrapbooking, I still have a couple things I like in my traditional albums.

One of those is the “Grow with Me” album. A consultant friend of mine introduced this idea to me very early on in my consulting days. I didn’t have any children at the time, but I loved the idea so much that I knew I wanted to do it when we did have children.

It’s a quick and simple project you can do in a matter of minutes each month or year. Or however often you choose to update your album.

First, create a super cute title page! 

I love how this one turned out with all the different stickers that span a child’s life.

Next, start taking a TON of pictures!! You’ll need a good 8x10 each month for their first year and then you can do 15m, 18m, 21m and 2yrs. Then, just do them semi-annually. Maybe a birthday picture and school picture?

Keep in mind, these don’t always have to be professional ones. Sometimes I like our own pictures better than ones we’ve had done at a studio. Truth: The pictures in my oldest child's album are mostly professional though. He was our first. We wanted to really capture his first year...and I was maybe, just maybe a little obsessed with dressing him up for the month/holiday coming up! Isn't he so darn cute though?!

 I do try to get at least a family picture (and some singles) taken twice a year. I do summer and then Christmas for our cards.

 I like to throw in little touches of stickers that kind of coordinate to the outfit or time of year too. Just makes it a little more fun!

I mean...isn't that smile just the cutest thing?! And what about those chubby fingers?? I just love chubby fingers!!!

So, reallythis album takes literally minutes to update!! In fact, I need to get all my kids’ albums caught up. All it takes is printing some 8x10 photos and a few extra minutes during naptime.
How do you preserve your family memories? Do you like digital or traditional scrapbooking? What’s your favorite album?

Happy Memory Keeping!

Blessings,
Annette

Linking up to these wonderful parties. Take some time and visit some of the other super talented ladies who've linked up as well!!! They always have some way cute things! (Just click on one of the buttons below to visit their link-up!) 

HookingupwithHoH

Monday, March 19, 2012

Sew its Saturday: DIY Activity Doors

My parents made these doors for the grandkids this past Christmas. They had replaced all their old bedroom/bathroom doors in the house and wanted to repurpose them. My mom watches all those DIY/Decorating Shows and saw something that sparked this creative idea! She’s so good at these thingsI on the other hand did not inherit that trait from her. I am however, a good copy-cat!


I’m sorry I don’t have the step-by-step photos for this project, but it’s pretty straight forward so I hope you’ll forgive me! Thatand my parents actually made these, soreally it’s my Mom’s fault.

  1. Get old doors. These were hollow and worked well since they were going to be hung on the wall. I’m sure you could use solid ones too though.
  2. You’ll want to buff the doors just enough to rough them up and get the sheen off. You don’t have to completely remove the finish, just rough them up so the paint will stick.
  3. Once you’ve roughed up the doors, now you can begin painting them. My parents chose a solid color for each door (boys and girls). 2-3 coats should do it.
  4. Once the base coat has been applied and dried completely, you can begin painting on the magnetic paint and/or chalkboard paint. Be sure and read the directions for these paints as they are quite different not only from each other, but also from regular household paint.
  5. Once you’ve applied those how you want, you can then apply embellishments, such as a border to the chalkboard or magnet area.
  6. After all your paint has dried, then you can start adding the “activities” you want. 
For my girls, in addition to the chalkboard (which they don’t use yet because they think chalk is food) we added door knobs (loosely so they spin), 


pull toys for the baby (when she starts crawling), a mini etch-a-sketch to draw on 


and magnetic dress-up dolls. The baskets hold their “clothes”isn’t that so cute?! 


They also mod-podged letters for each of the girls and added a couple extra embellishments to fill in the extra space.


The boys, being older, have a larger chalkboard area, a hook to hang things on or tie things to and run around the roombut my boys don’t do that so don’t worry. 


The wonderful grandparents they are also put two Velcro vests on there that you throw balls at for fun. I suppose that is better than them wearing them and throwing the balls at each other though, right?! 


A basketball goalthat glows in the dark even! And a letter mod-podged with scrapbook paper for each of them. They also added a couple extra fun things and embellishments on the corners of their chalkboard.

So, what do ya think? Aren’t they so cute? The kids love to play with them and I usually find my Miss Priss in her room drawing on the etchy thing. She absolutely loves it. Well, that and pulling all the doll clothes out and carrying around the house so mom frantically picks them up so we won’t loose them before she’s ready to really play with them. Maybe those weren’t the best idea for an almost 2yr old?!

I would love to see what you’ve done with old doors! Share your ideas in the comments or link back to your own blog to a project you’ve done!


Thanks for stopping by!
Blessings,
Annette


Linking up here: