


I know this DIY project is not highly creative, but I
was proud of my find and frugal-ness!
So alas…I share it with you. Don’t laugh at me, but you can giggle a bit! I
know I’m goofy and not that creative. I’m working on it though!
But, while you’re here you might as well enjoy some
cute pictures too! So, sit back, relax and smile!
A couple months ago I found all of our kids’ Easter
outfits. I was beyond thrilled! Then last week I realized
my girls had no hair bows to match their dresses!!! AAHHHH!!!!!

As I was walking through Target last week, I glanced
at the $1 bins (which I love by the
way) and saw these cute hats! I picked up two of them and instantly knew I
could make them work for the girls’ dresses. WAHOO!!!
So, Saturday morning…yes, the day before Resurrection
Sunday…I set out to transform these hats. Pretty easy really, but so fun! Well,
all except for my poor burnt fingertip…

First, I removed the pink ribbon from the hats.

Then, I measured the length of the pink ribbon, so I
knew how long to make my purple ribbon.

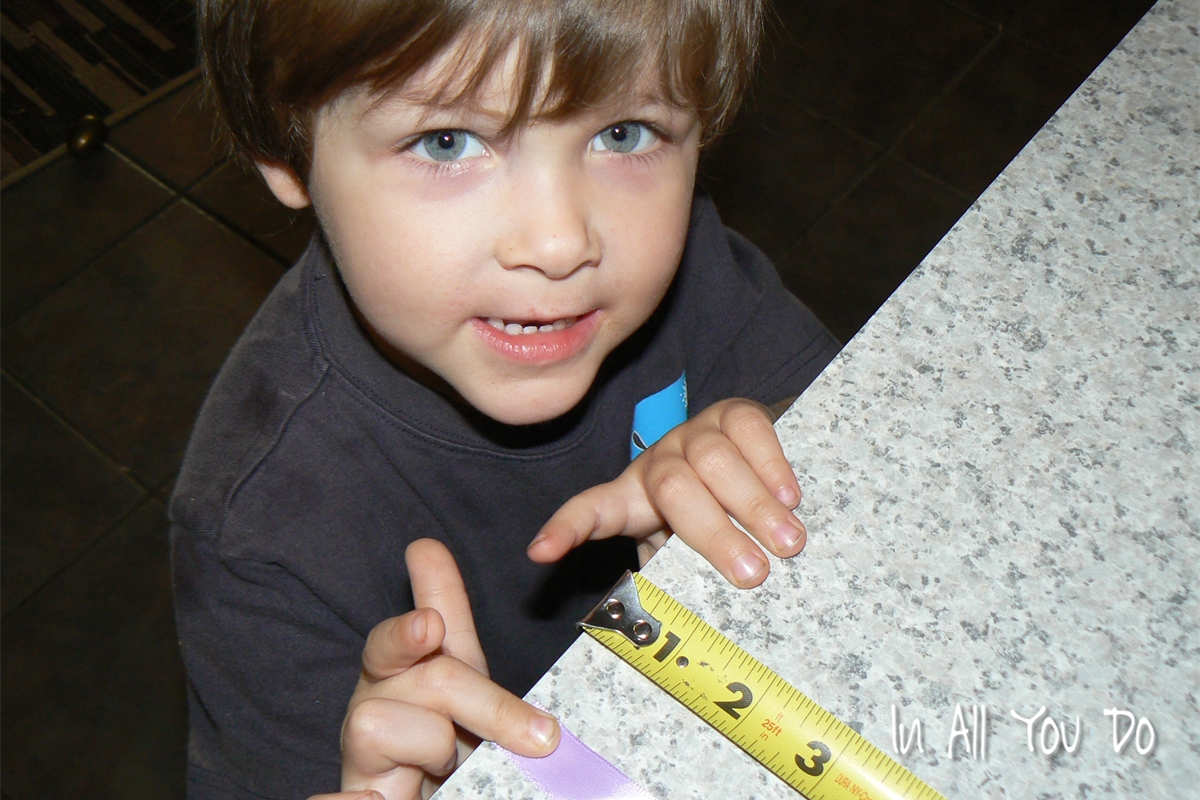
Measure out the purple ribbon and cut. Be sure to use
a cute little helper to hold the scissors in place while you take a picture
too! Never mind his dirty finger I called him in from outside to help. Next
time I’ll be sure to make him wash his hands before he models for me!
Since big brother was helping, Mr. Mouse decided he
needed to help by holding the tape measure and ribbon for me! Those blue eyes melt my heart!!

Next I put the purple ribbon around the hat and made
sure it was even before tying the knot.

Once it was even, I tied a knot in it. Actually, I
tied a double knot, but I recommend only a single knot.

Now, most of you probably know this trick, but for
those of you who don’t…in order to make a perfect and easy bow, simply make two
loops, wrap one around the other and through, then pull tight. That way the
loops stay nice and pretty!

Isn’t it pretty?!

Make sure you trim the edges at an angle before
you’re done!

And since I was using two colors, I then measured the
green ribbon right on the hat. I forgot to take a picture of that, so pretend
this isn’t cut yet and I’m really measuring it. I just started as close to the
knot as I could on one side and wrapped it around until I was as close to the
knot on the other side.

Last I took my hot glue gun and tacked the ribbons in
place so they wouldn’t fall off. If you’re a better crafter than I, you should
probably put the glue on before you
tie the first ribbon. Mine didn’t end up quite as straight as I’d like, but
they work!

Don’t forget to remove the price tags! You wouldn’t
want anyone mistaking your beautiful work for a professional. Haha

This entire project cost me the $2 for the hats and
then $4.87 for the ribbon!! These cute little hats for less than $7.00!!!! Now that’s a DIY project I can fund!
So, here are some cute pictures from Resurrection
Sunday and the girls’ in their oh so cute hats!

Here’s my sweet family!!! I’m so lucky! I edited the picture a bit, it's not completely perfect, but it works!

Here are the Littles. My oldest daughter is having a
major meltdown, as you can see…all because her shoe (in the purple circle) came
un-done! I’m pretty sure the hunger and desperate need of a nap had nothing to
do with it! Ha!

And this precious little bundle is always full of
smiles!! She brightens my day with this contagious smile!! She is a complete
JOY to have in our family!
Blessings,
Annette


2 comments:
Adorable hats and really adorable family!
Thank you so much, Rose! I'm quite partial to them myself! hehe
Post a Comment